Advertisement
In Her Latest Cookbook, Flour Bakery's Joanne Chang Makes Life Sweet With Less Sugar
Joanne Chang has coined a great phrase: "Make life sweeter, eat dessert first."
And if she's the one making dessert, we'll happily live by those words.
She's a pastry chef and owner of Flour Bakery, and she's made it her life's mission to make food that's just so good you can't stop eating it.
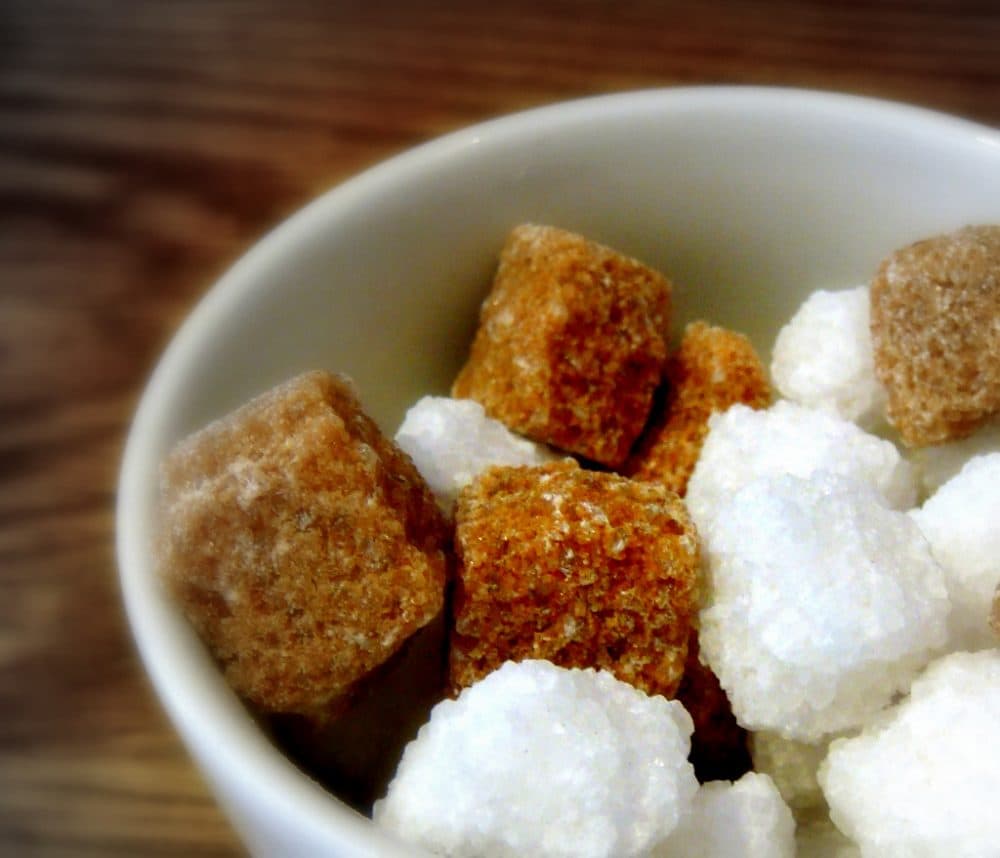
Her third and most recent cookbook continues that mission — but she's added the challenge to make life sweet with less sugar.
The book is called "Baking with Less Sugar" and includes more than 60 sweet treats made with natural sweeteners or little to no white sugar.
Guests
Joanne Chang, pastry chef and owner of Flour Bakery. Chef and owner of Myers + Chang in the South End. She tweets @jbchang.
More
Publishers Weekly: Just As Sweet: 'Flour' Author Bakes With Less Sugar
- "The self-described 'sweets addict' is back with 'Baking With Less Sugar'...offering recipes with white sugar alternatives — honey, molasses, fruit juice, coconut milk — that still satisfy."
Epicurious: Which Healthier Sweet Tooth Guide Is Right for You?
- "In Cookbook Versus, we look at two seemingly similar new cookbooks, letting you know what type of cook will dig each of them. Today, it's Real Sweet by Shauna Sever versus Baking With Less Sugar by Joanne Chang."
Bittersweet Chocolate Pots De Crème
Makes: 8 custards
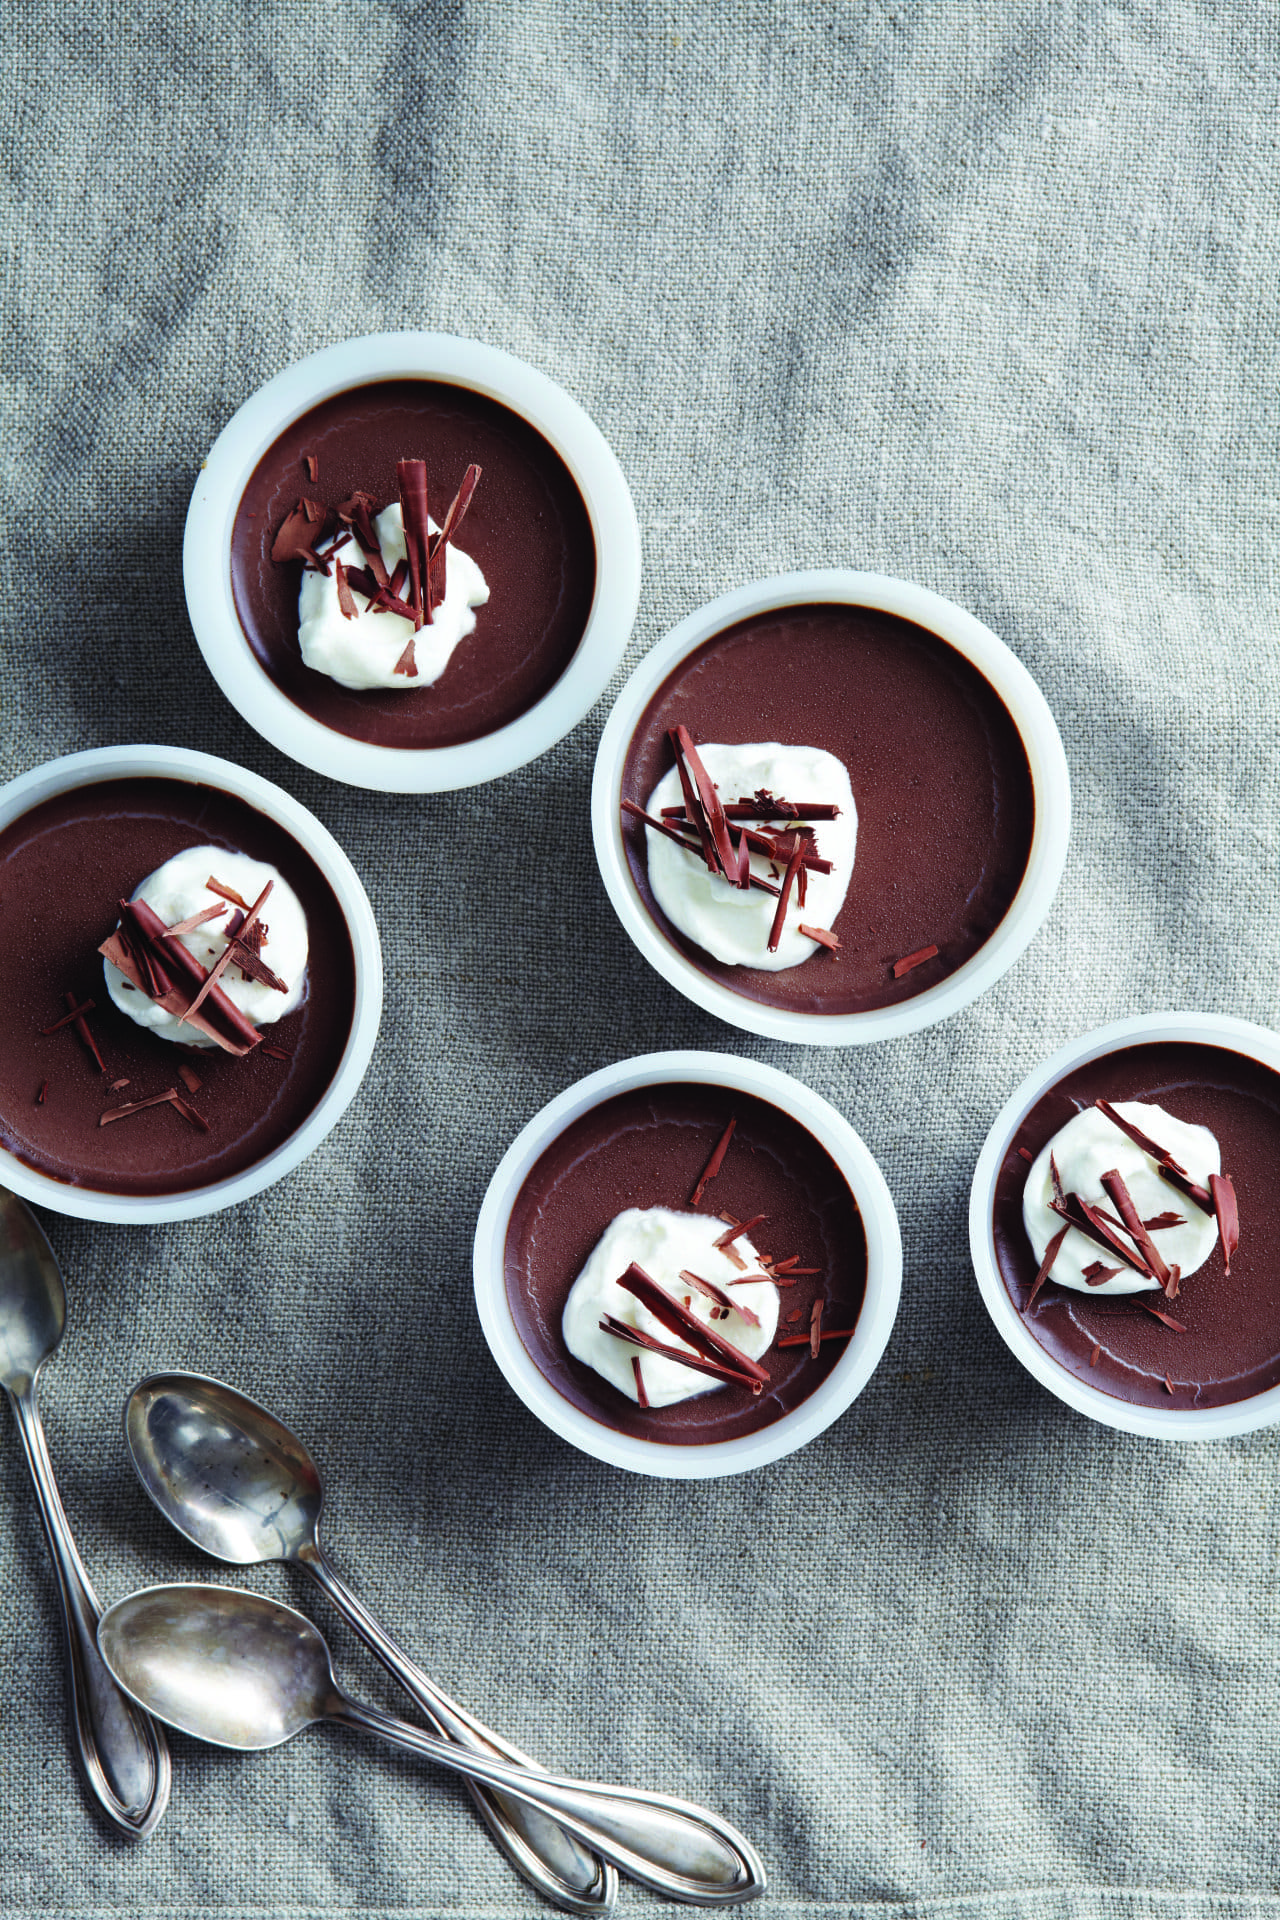
"I adore bittersweet chocolate. I love how it hits you deep and sharp on your tongue with little relief from the sweetness of sugar and how it lingers faintly smoky in your mouth. If you are a milk-chocolate or even semisweet-chocolate fan only, then this custard is not for you. It is rich and powerful and not for those who shy away from strong, assertive flavors. Be sure to select a fabulous eating chocolate as this recipe essentially turns the chocolate into a creamy, silky-smooth custard. Serve it to true chocolate aficionados or people who enjoy examining the various subtleties in coffee or wine — or both! — as you’ll be able to taste all of the different flavors within the chocolate here. The salt is essential in this recipe; it keeps the custards from tasting flat and brings out all of the dark chocolate flavors. As with all of the recipes in this book, use kosher salt or half the amount of regular table salt, which is a lot finer. You’ll need eight 6-oz [180-ml] ramekins along with a fine-mesh strainer for this recipe. With about 110 grams of sugar (just over 1/2 cup) in the chocolate in the whole recipe, each custard has just under 14 grams of sugar per serving."
Advertisement
Ingredients:
960 g/4 cups whole milk
280 g/10 ounces bittersweet chocolate, finely chopped
2 large eggs plus 4 egg yolks
1 1/2 teaspoons kosher salt
1 tablespoon vanilla extract
unsweetened heavy cream, whipped to soft peaks, for garnish
shaved chocolate for garnish
Instructions:
1 Place a rack in the center of the oven and preheat to 325°F (165°C).
2 Heat the milk in a medium saucepan over medium heat until scalded — that is, small bubbles form on the edges of the milk and it almost, but not quite, comes to a boil. Turn off the heat.
3 Meanwhile, bring a saucepan filled partway with water to a very gentle simmer over medium heat. Place the chocolate in a metal or glass bowl. Place the bowl over (not touching) the barely simmering water in the saucepan and heat, stirring occasionally with a wooden spoon or rubber spatula, until the chocolate is completely melted and smooth. Alternatively, microwave the chocolate in a microwave-safe bowl in 30-second intervals, stirring after each interval, until melted and smooth.
4 Set a fine-mesh strainer over a pitcher or measuring cup. Pour the scalded milk over the melted chocolate and whisk to combine well. Let sit for 2 to 3 minutes and whisk well again to ensure that the chocolate and milk are completely blended. In a large bowl, whisk together the eggs and egg yolks and slowly whisk the hot milk-chocolate mixture into the eggs. Strain the mixture through the fine-mesh strainer into the pitcher. Stir in the salt and vanilla.
5. Arrange eight 6 ounce (180-ml) ramekins in a roasting pan with deep sides. Pour the custard mixture evenly into the ramekins. Carefully move the roasting pan to the oven. Fill the pan with hot water halfway up the sides of the ramekins. (This is a water bath and will protect the pots de crème from over-baking.) Cover the pan loosely with aluminum foil. Bake for 35 to 45 minutes, or until just set. Be sure to start checking early; baking time will depend on the thickness and depth of your ramekins and roasting pan. The pots de crème will wiggle stiffly like firm Jell-O when they are done. Carefully remove the roasting pan from the oven and let the ramekins cool in the water bath. Remove the cooled ramekins from the roasting pan, cover with plastic wrap, and refrigerate for at least 4 hours or up to 2 days.
6 Serve the pots de crème, completely chilled, in their ramekins with a little dollop of whipped cream and a sprinkle of chocolate shavings.
Cinnamon Sugar Monkey Bread
Makes: One 8-inch (20-cm) cake
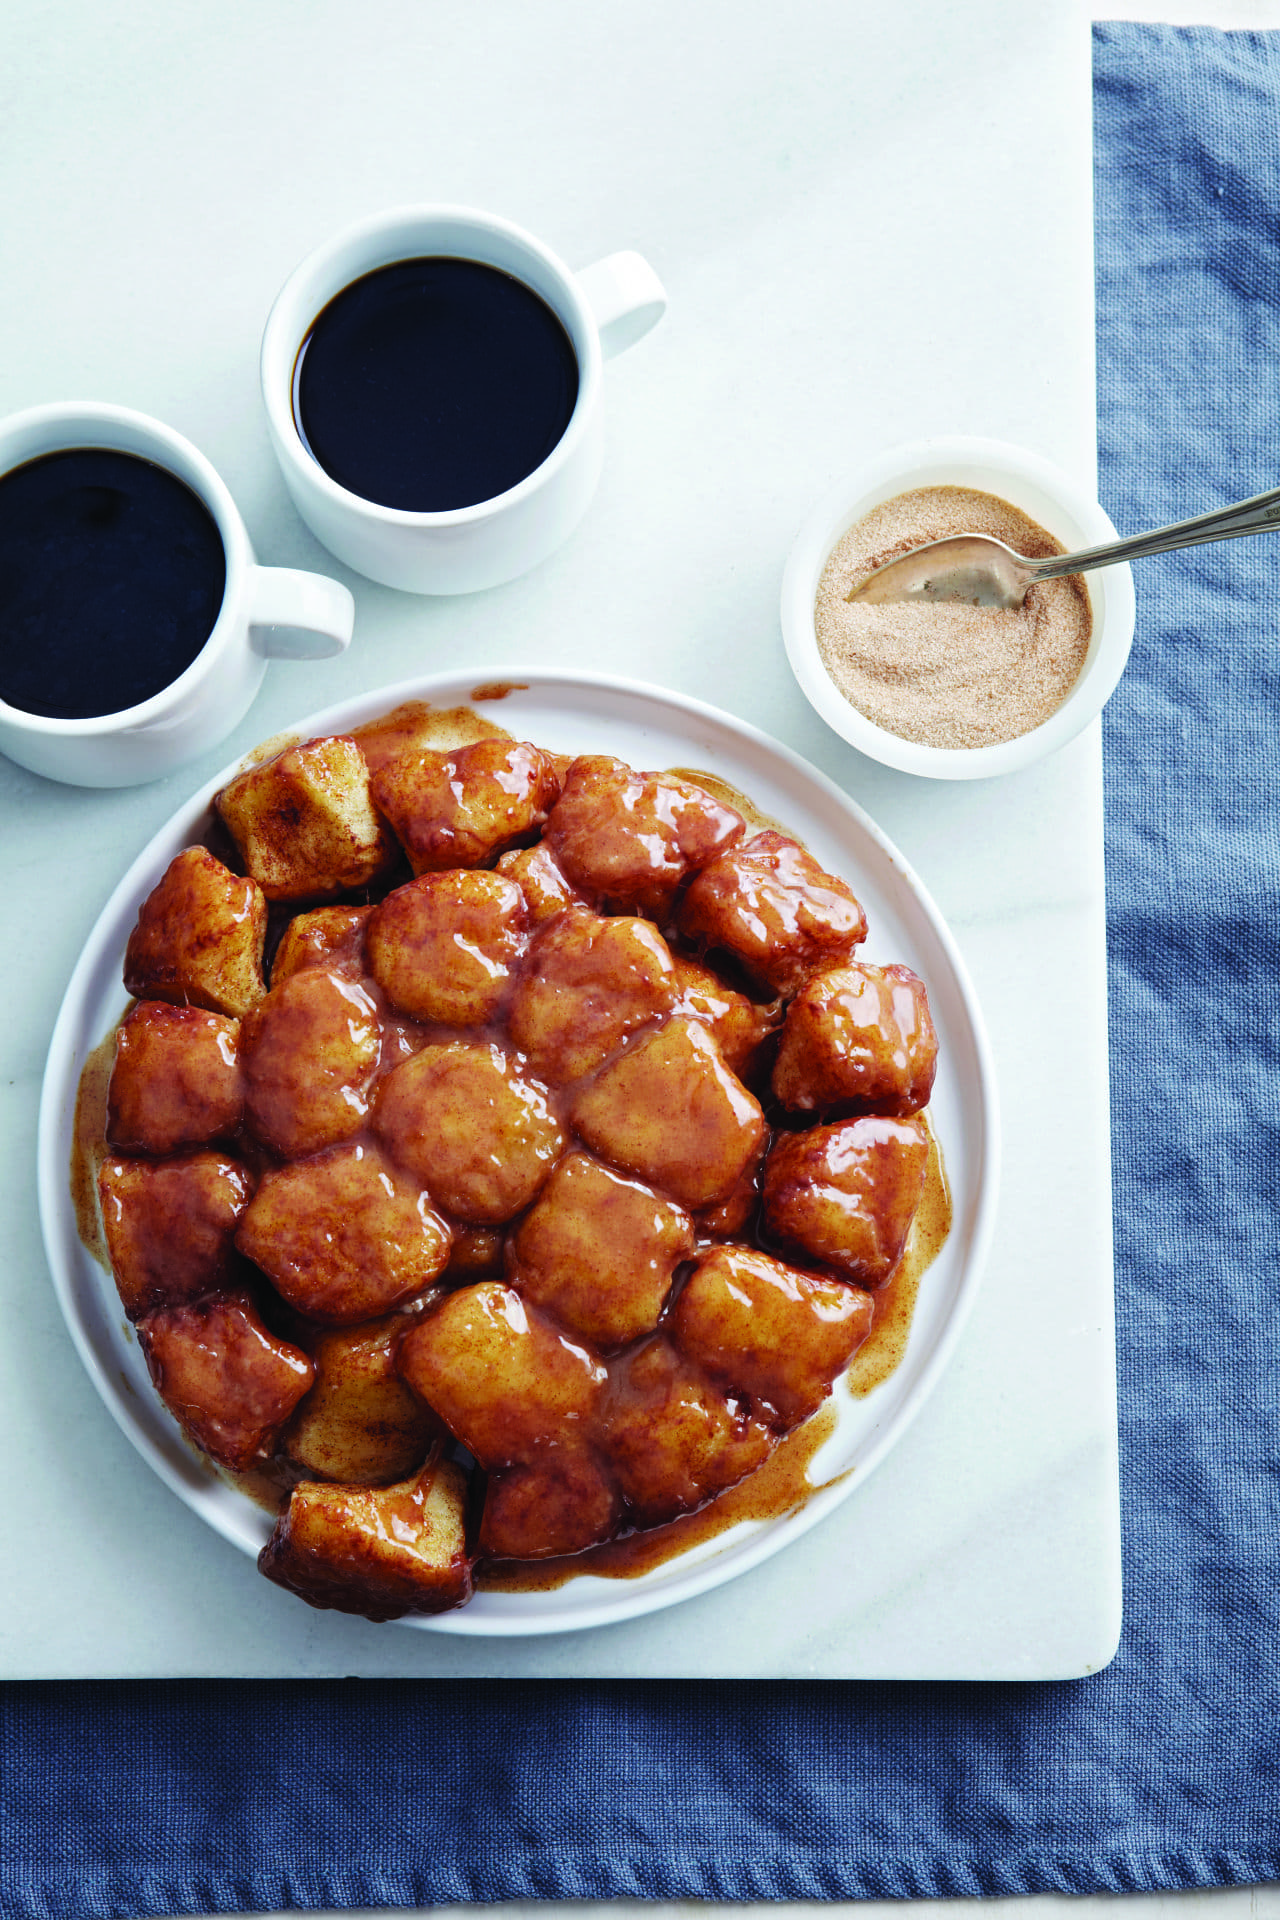
"Certain desserts just don’t seem destined for a low-sugar makeover. I didn’t even attempt to make angel food cake — which relies on sugar to stabilize the egg whites in the batter — or caramels — where sugar is the main ingredient. One of my pastry chefs Jon and I were tossing around other desserts that would be difficult to make with little sugar when he piped up, “MONKEY BREAD!” We both stopped for a second and looked at each other — and the challenge was on! Monkey bread, according to most theories, gets its name from the little balls of dough that bake all together and then you pluck them one by one to eat them, similar to a monkey who likes to pluck at, well, everything. The bread dough is a simple, rich dough that gets dipped piece by piece into butter and cinnamon sugar. Before baking, you pour a cream-butter-sugar mixture over the whole thing and it bakes into the dough, leaving a light caramel topping on the little breads. It’s definitely not as gooey and tooth-achingly sweet as a traditional monkey bread recipe, but it is crazy delicious. After a while Jon and I kept making this under the guise of “more testing,” but in reality it was just because we loved eating it so much."
Bread Dough Ingredients:
180 g/3/4 cups whole milk, at body temperature (when you put your finger in it, it should feel neither cold nor hot)
1/2 teaspoon active dry yeast or 3 g/ 0.1 ounce fresh cake yeast
280 g/2 cups unbleached all-purpose flour, plus up to about 35 g/1/4 cup more, if needed
1 teaspoon kosher salt
Ingredients:
3 tablespoons unsalted butter, very soft
1 egg yolk
115 g/1/2 cup unsalted butter, melted
100 g/1/2 cup sugar
2 teaspoon ground cinnamon
2/3 cup heavy cream
Instructions:
1 To make the dough, lightly oil a large bowl.
2 Using a stand mixer fitted with the dough hook attachment or in a medium bowl, combine the milk and yeast and let sit for 20 to 30 seconds to allow the yeast to dissolve and activate. Dump the flour and salt onto the milk, and carefully turn the mixer on medium-low speed. (Or use a wooden spoon to mix the flour into the milk, and switch to using your hands to mix the dough when it gets too stiff.) Let the dough mix for about 10 seconds. (To prevent the flour from flying out of the bowl, turn the mixer on and off several times until the flour is mixed into the liquid, and then keep it on low speed.) When the dough is still shaggy looking, add the butter and egg yolk.
3 With the mixer still on medium-low speed, knead the dough for 2 to 3 minutes, or until it starts to come together into a sticky dough. (If making by hand, continue to knead the dough by hand; it will be very sticky and soft, but keep turning it over onto itself and folding it in half and punching it in the middle to encourage the dough to develop more stretchiness.) The dough will be somewhat soft and tacky and have a bit of a stretchy consistency. If it is much stiffer than this, mix in 2 to 3 tablespoons water; if it is much looser than this, mix in 2 to 3 tablespoons flour.
4 Transfer the dough to the oiled bowl. Cover the bowl loosely with a piece of plastic wrap or a damp lint-free cloth. Place the bowl in a draft-free, warm place (78 to 82°F [25 to 28°C] is ideal; an area near the stove or in the oven with only the pilot light on is good) for about two hours. The dough should rise until it is about double in bulk. (This is called proofing the dough.)
5 When the dough has doubled in size, dump it out onto a well-floured work surface and stretch it into a long rectangle about 12 inches by 4 inches (30 cm by 10 cm). Using a bench scraper or a knife, divide the dough the long way into four narrow strips, each about 1 inches (3 cm) wide. Then divide each dough strip into eight pieces so that you end up with 32 little nuggets total.
6 Butter and flour an 8-inch (20-cm) round cake pan with sides that are at least 2 inches (5 cm) high. Put the melted butter in a small bowl.
7 In a separate small bowl, mix together the sugar and cinnamon. Roll each dough nugget into a little ball and dip into the melted butter, shake off any excess butter, and then roll around in the cinnamon sugar. Place the nuggets in the prepared cake pan, close to each other, but with a little space in between each nugget, to cover the bottom of the pan. When you fill up the bottom of the pan, continue by stacking them on top of each other. When all of the nuggets have been buttered and sugared, drape a piece of plastic wrap or a damp lint-free cloth over the cake pan and let sit in a draft-free, warm place for another one to 1 1/2 hours. When the nuggets have proofed — that is, when they have grown in size and feel soft and puffy — they are ready to bake.
8 Place a rack in the center of the oven and preheat to 350°F (175°C). In a small bowl, whisk together the remaining butter and cinnamon sugar and then whisk in the cream. Pour this mixture evenly over the top of the nuggets (it will drown the nuggets) and place the cake pan in the oven. Bake for 45 to 55 minutes, or until the tops of the nuggets have turned light golden brown, rotating the pan about halfway once during baking.
9 Remove the monkey bread from the oven and let sit for about 5 minutes. Invert the bread onto a serving plate. If there is a little bit of goo on the bottom of the cake pan, scrape it directly onto the monkey bread with a rubber spatula (or whisk in 2 to 3 tablespoons cream or water to thin it out and pour it over the monkey bread). Serve warm.
10 The monkey bread is best enjoyed the same day you bake it, but it can be stored at room temperature in an airtight container for up to two days. If desired, rewarm the bread in a 300°F (150°C) oven for about 10 minutes.
This segment aired on May 22, 2015.