Support WBUR
Canning 101: How To Preserve Your Summer Garden's Spoils Before They Spoil
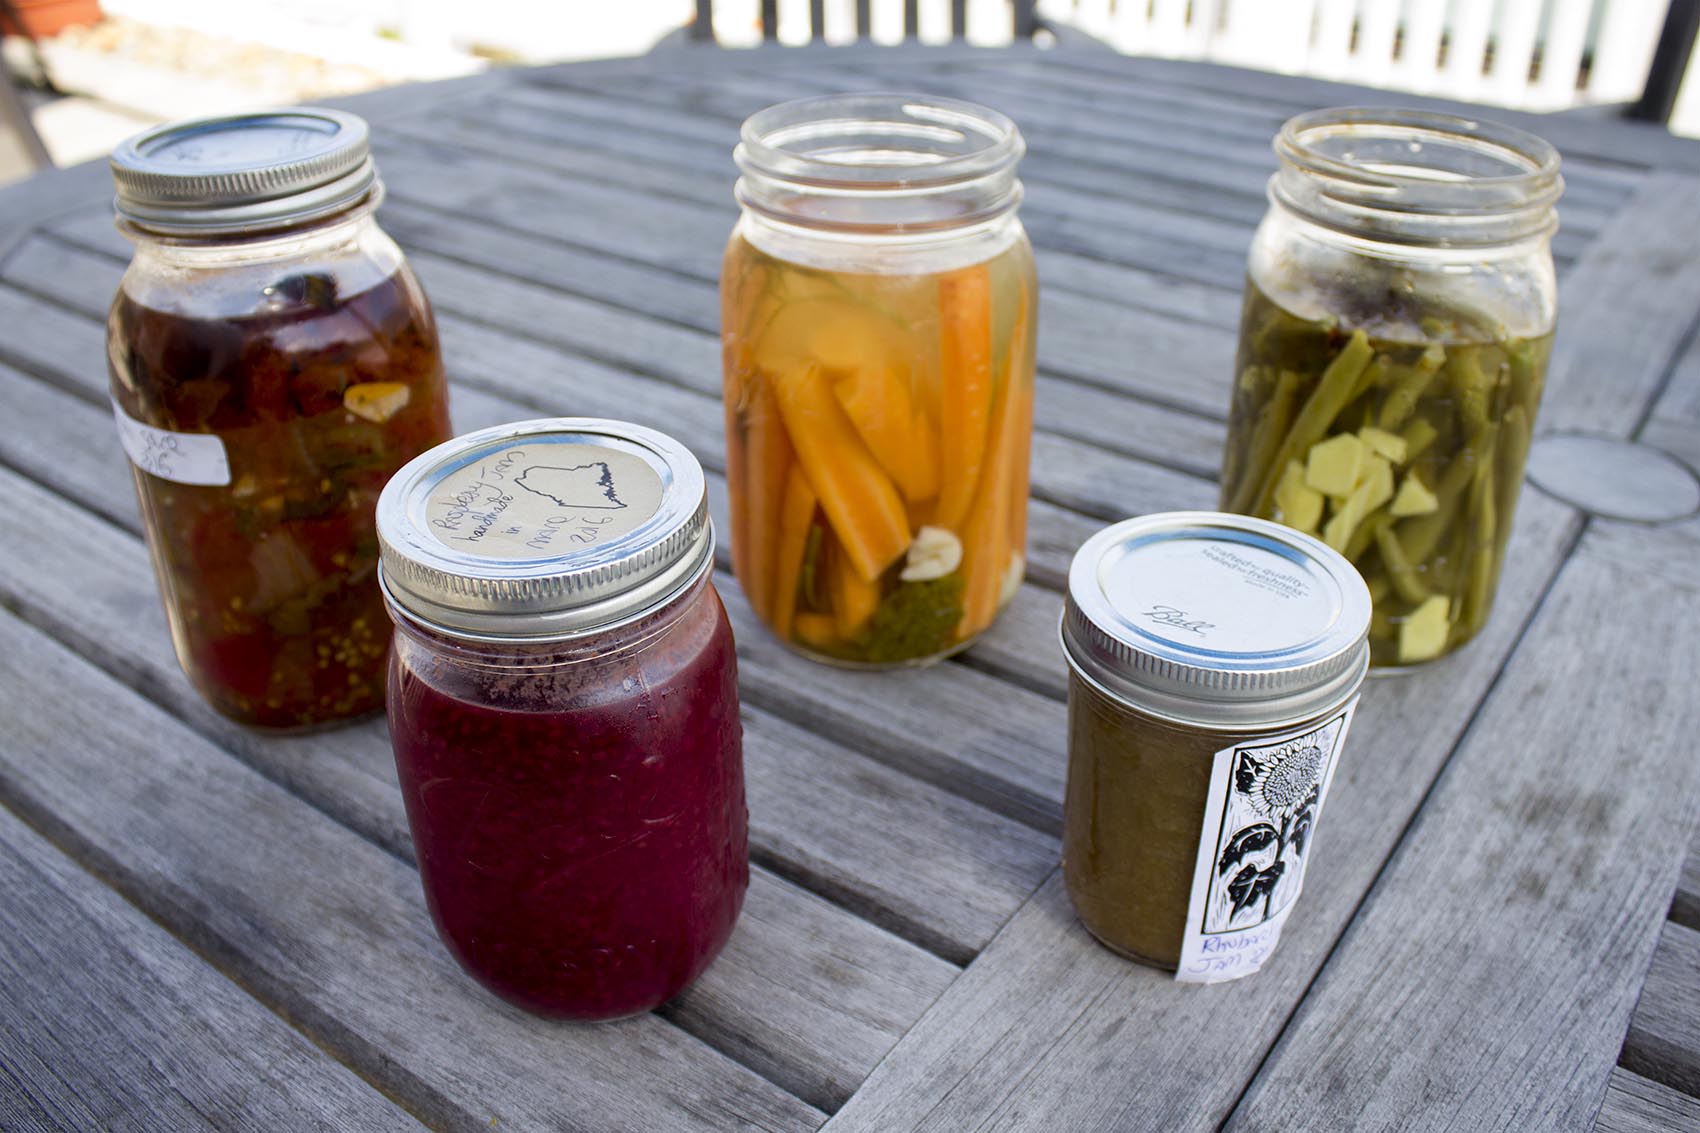
Fall is fast approaching and for Here & Now resident chef Kathy Gunst, it's canning time. Kathy brings Here & Now's Jeremy Hobson recipes and samples for chile-sesame pickled green beans, pickled carrots, plum conserves and roasted tomato sauce. She also provides tips and advice for canning at home.
Why can?
A deeply philosophical question. But seriously, doesn't it take time? Isn't it complicated? Aren't there safety risks?
The idea behind canning is to preserve the very freshest, ripest summer foods — be it seasonal fruit, vegetables or edible flowers — before they begin to decay. You want to capture that food at its finest moment and stop time.
This guide should help answer some of your questions and lead you to some great resources. Gather some friends, collect canning jars, take a visit to your local farmers market, friend's garden or your own, and get canning.
Basic Canning Equipment And Instructions
Canning doesn't have to be scary. But to do it safely and properly, you do have to follow some basic rules. Always find very fresh produce to work with. Otherwise, what's the point?
Here's what you'll need:
- Canning jars and brand-new lids
- A large pot (12- to 16-quart canning pot or large lobster pot) that holds at least six jars without having them bump into one another
- A canning rack (that the jars fit into without bumping against each other) or a cooling rack or cake rack you can place upside down in the pot
- Counter space for working and letting clean jars dry
- Tongs or canning jar lifter (for lifting hot jars out of the boiling water bath)
- Clean dish towels
- Labels or stickers to label all the jars
Here's how it works:
- Wash all the jars and lids in hot soapy water or run through the dishwasher.
- Lids can be placed in a bowl of boiling hot water and left soaking until ready to use.
- Fill the canning or large pot with water three-quarters of the way and bring to a boil over high heat.
- Place the washed jars in the boiling water for about three to four minutes to sterilize.
- Drain the jars on a clean tea towel until dry.
- Fill the clean, sterilized dry jars with your pickles or jam or chutney. Do not overfill the jars — leave about 1/2 inch of headspace.
- Top with vinegar solution or sugar syrup or whatever you are using.
- Use a clean tea towel or paper towel to clean around the rim of the jar thoroughly.
- Remove the lids and seals from the bowl of boiling water, and dry thoroughly. Seal the filled jars. Don't screw on the ring too tightly.
- Follow the recipe or check USDA instructions to see the length of time your sauce, jams, jellies, pickles or other foods need to process safely.
- Don't take shortcuts: The time starts once your jars are lowered into the water and the water has once again come to a full rolling boil.
- When the jars are done, place them on a clean tea towel and do not touch, shake or handle them until thoroughly cool.
- You might hear a 'ping' or gentle thumping noise as the jars cool — that's the seal taking hold and means you have a good, safe jar.
- Best test to make sure you have a safe seal: Once cool, remove the screw part of the lid and try to remove the lid by gently pulling on it. You're not really trying to remove the lid but testing the seal. It should feel tight and hold. If the lid comes off easily it was not a good seal. You can place this jar in the refrigerator and enjoy the food in the next few days.
- Another test: Tap on the jars — they should all have the same sound when you tap gently on the lids. You should hear a hollow-sounding 'ping.' You should also see the center of the lid slightly sunken down, which also indicates a good seal.
- Always label and date your canned foods.
- Store the canned jars in a cool, dark spot, preferably a cellar, basement or dark pantry out of sunlight and heat.
- Use within one year, unless recommended for less time.
Recommended Reading And Websites On Safe Canning Practices
Books:
- "Mrs. Wheelbarrow's Practical Pantry," by Cathy Barrow (WW Norton)
- "Saving the Season," by Kevin West (Knopf)
- "Preserving Italy," by Domenica Marchetti (HMH)
- "Quick Pickles," by Chris Schlesinger and John Willoughby (Chronicle)
- "The Blue Chair Jam Cookbook," by Rachel Saunders (Andrews McMeel Publishing)
- "Food in Jars," by Marisa McClellan (Running Press)
Websites:
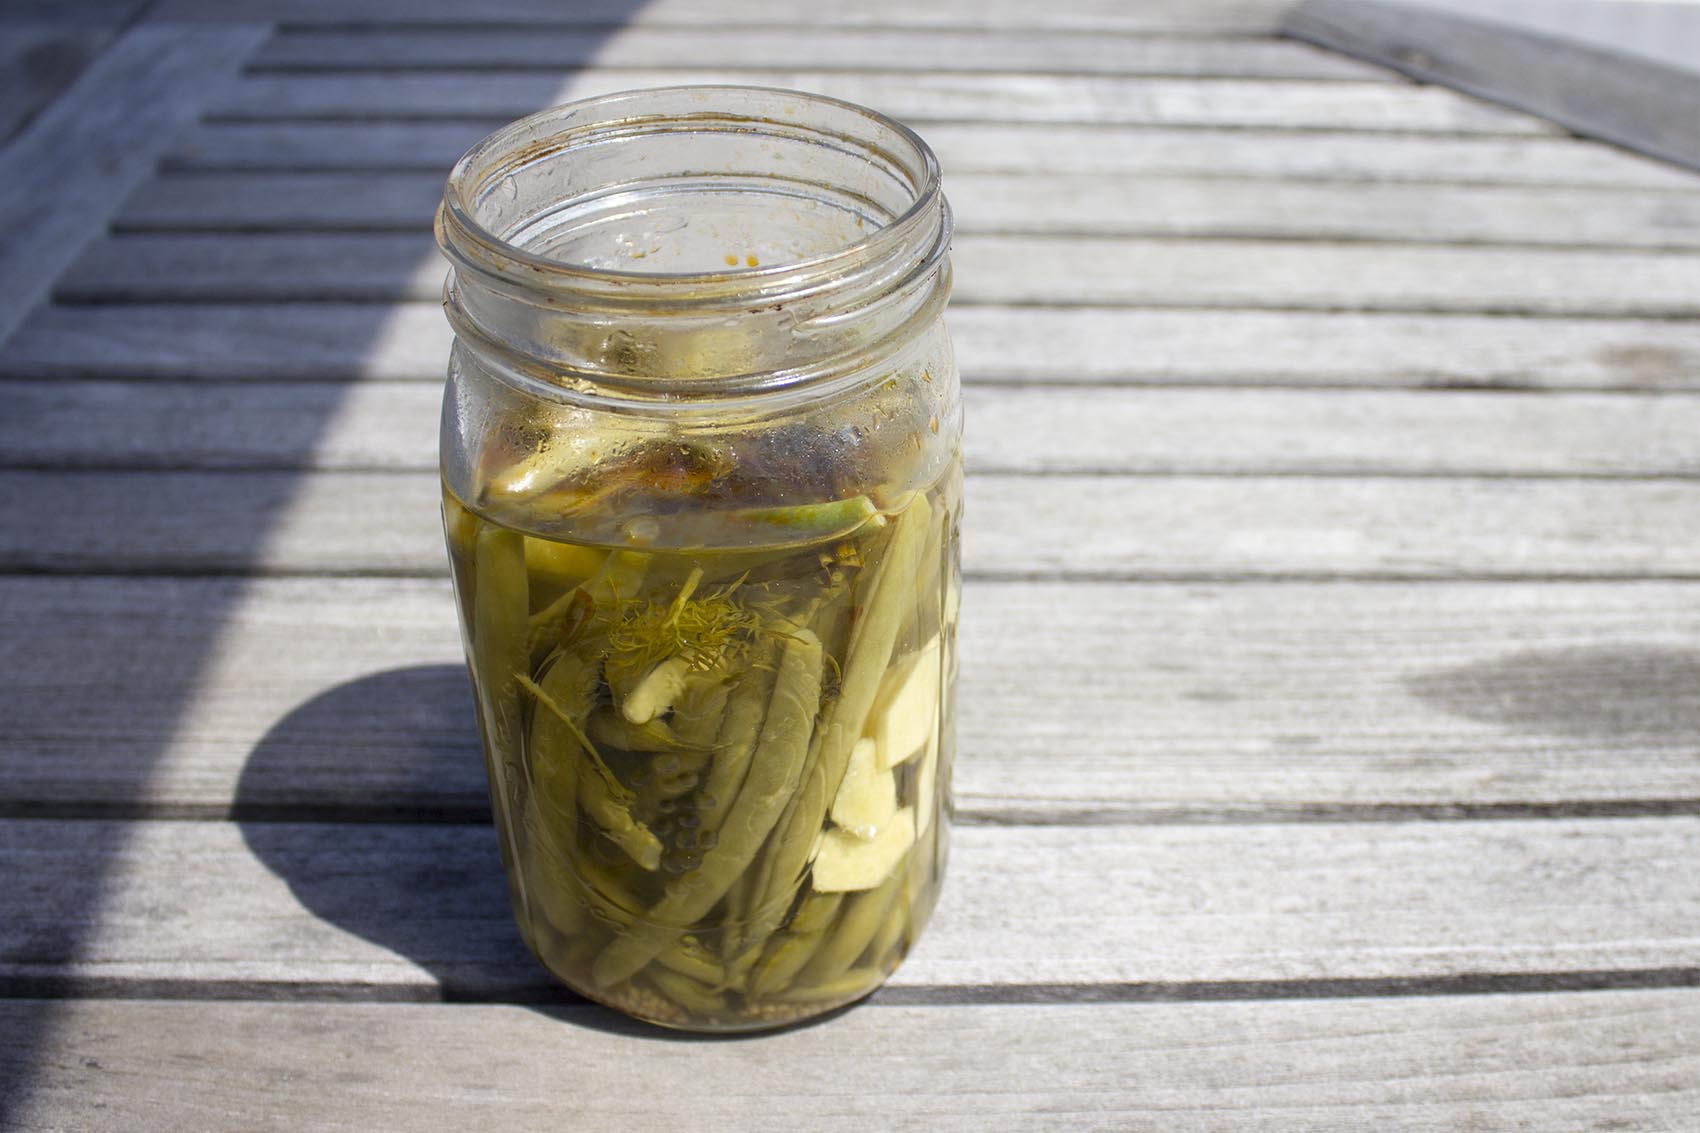
Chile-Sesame Pickled Green Beans
Fresh green beans — I like them on the thin side, but any thickness will work — are placed in a canning jar with slivers of fresh ginger, lemongrass, mustard seeds and fresh dill and covered in a rice wine vinegar solution.
The beans will keep in your refrigerator for up to three months, or can be processed for 10 minutes and will keep for over a year. Either way you'll enjoy the snappy bean with a slightly spicy bite.
This recipe is for 1 quart of beans, but can easily be doubled or tripled depending on how many beans you have. Serve these pickles with a cheese platter, grilled or roasted meats or seafood, or as a snack.
Ingredients
- 8 ounces green beans, washed and dried with ends trimmed
- 1/4 cup chopped fresh dill and/or fennel or dill heads (the flowering top of the plant)
- 1 teaspoon black peppercorns
- 1 teaspoon yellow mustard seeds
- 1 1/2 tablespoons fresh ginger, peeled and very thinly sliced
- 1 dried red chile pepper
- 1 tablespoon chopped fresh lemongrass (optional)
- 1 1/2 cups rice wine vinegar
- 1 cups white wine vinegar
- 1 cup cold water
- 1/2 tablespoon kosher or canning salt
- 1 1/2 teaspoons hot sesame oil (this is sesame oil infused with chiles; you can also use regular sesame oil and add an extra dried red chile)
Instructions
- Sterilize a one-quart canning jar in hot soapy water (use boiling water if processing the beans) and dry thoroughly. Place the beans in the jar, pushing down on them so they are fully below the lid. Add the dill, peppercorns, mustard seeds, ginger slices, chile peppers and lemongrass.
- In a medium non-reactive saucepan combine the rice wine vinegar, white wine vinegar, water, salt and sesame oil (and chile pepper, if using). Bring to a rolling boil over high heat. Pour the hot vinegar solution over the beans; it should come right up to the edge of the lid. Seal and place in the refrigerator or seal and process for 10 minutes (see Basic Canning Instructions). Makes 1 quart.
Pickled Dill And Garlic Carrots
These carrots have a great snap and a refreshing flavor. Chop them into salads or salad dressings or serve as part of an antipasti platter. You can easily double or triple this recipe.
Ingredients
- 1 pound very fresh carrots, peeled and cut into about 1/4-inch thick sticks
- 3 cloves garlic, thinly sliced
- 1/4 cup chopped fresh dill and/or fennel or dill or fennel heads (the flowering top of the plant)
- 1 1/4 cups water
- 2 cups cider vinegar
- 1/4 cup sugar
- 1 tablespoon Kosher or canning salt
- 1 bay leaf
Instructions
- Sterilize a one-quart size canning jar in hot, soapy water or sterilize in boiling water if processing the pickles. Place carrots in the canning jar and add the garlic, dill and/or fennel.
- In a medium non-reactive saucepan, heat the water, vinegar, sugar, salt and bay leaf until boiling over high heat.
- Pour the hot vinegar solution over the carrots and seal. Place the pickles in the refrigerator, where they will keep for up to three weeks, or process (see Basic Canning Instructions) for 10 minutes. Makes 1 quart.
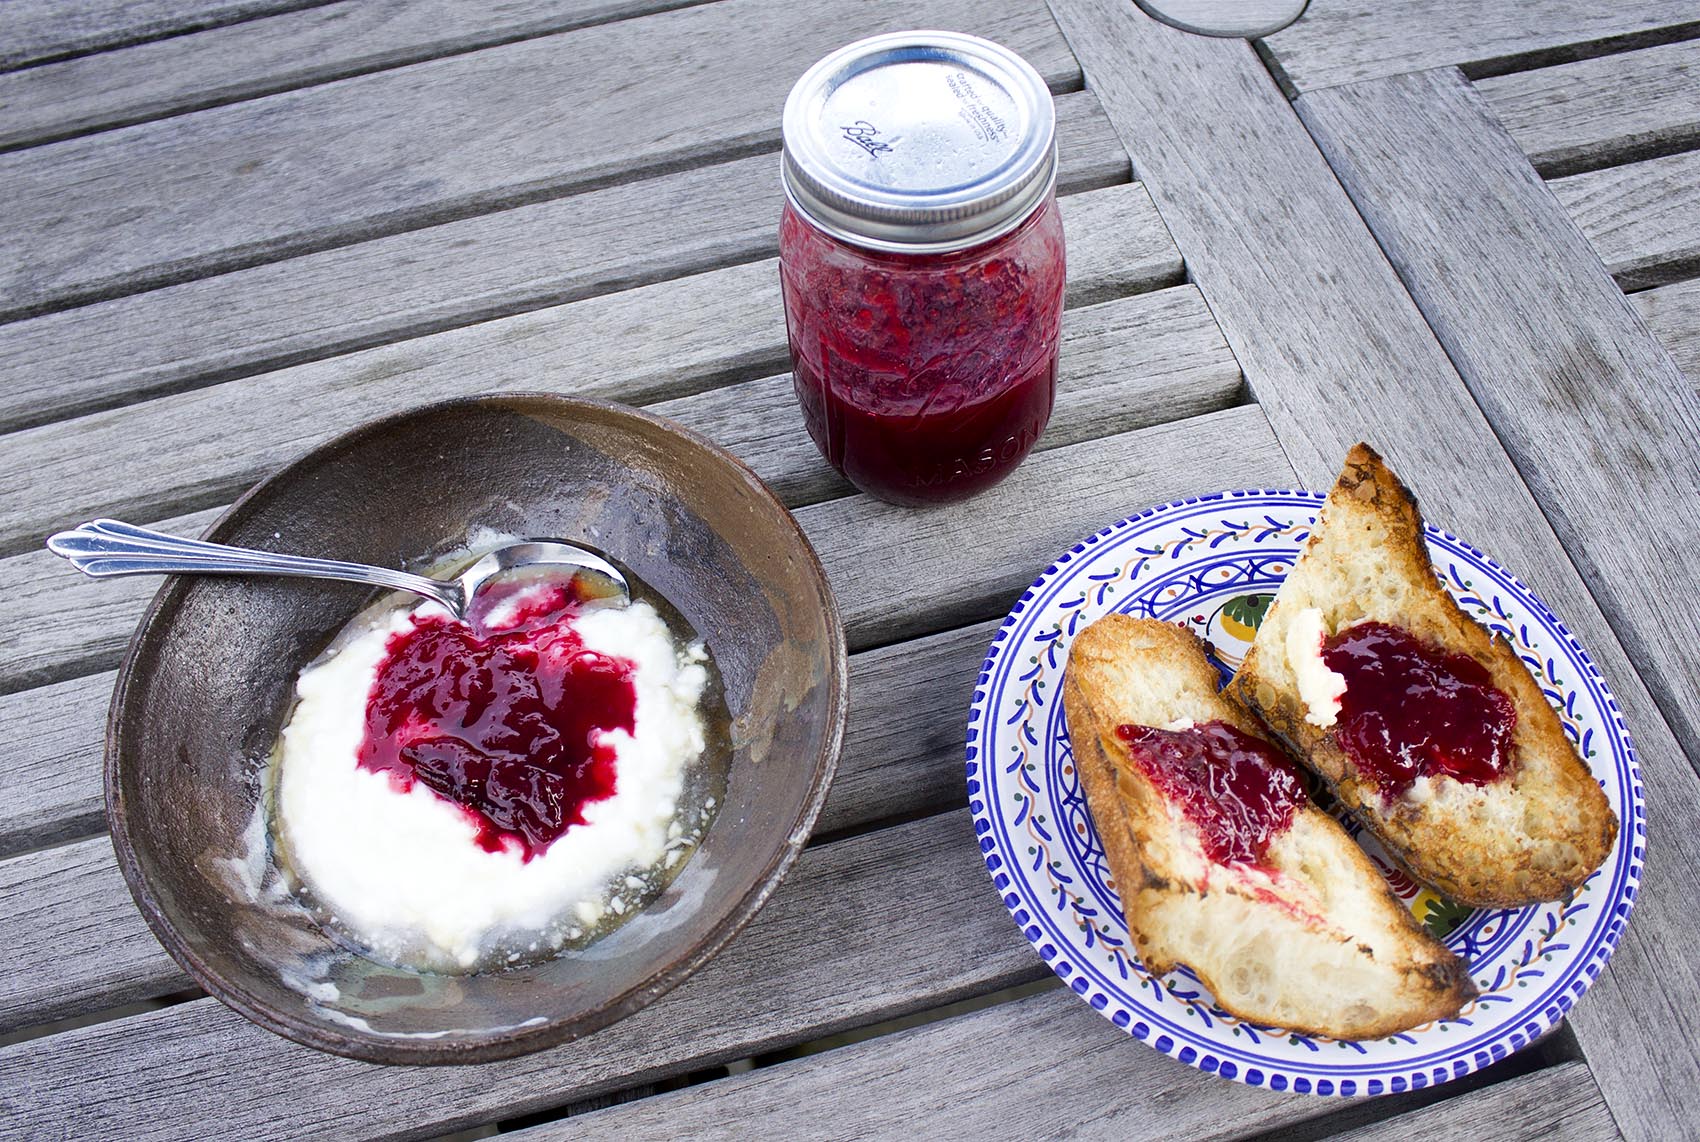
Plum Conserves
Find really fresh local fruit and you will be justly rewarded. This is like a cross between a jam and conserves: thick enough to coat a spoon but not super thick. I don't like making these conserves super sweet — you want to taste the flavor of that gorgeous fruit. But if you like a sweet flavor, add a bit more sugar.
Serve on plain yogurt with a drizzle of maple syrup, on buttered toast, with roasted meats, cheese sandwiches, etc.
Again, if you have a surplus of fruit, feel free to double or triple the recipe. You can also add peaches, nectarines or berries. Makes 2 cups.
Ingredients
- 1 pound ripe plums, preferably locally grown, pitted and cut into quarters if small and thin slices if large
- 1/2 cup, plus 2 tablespoons sugar
- 1 tablespoon lemon juice
- 1 to 2 teaspoons natural pectin
Instructions
- In a large bowl, toss the plum slices with the sugar. Cover and refrigerate for at least two hours and up to overnight.
- Place the plums and any juices that have formed in the bottom of the bowl in a medium non-reactive saucepan. Bring to a boil over high heat, skimming off any foam that forms on the top. Reduce the heat to moderate and let simmer.
- Place the lemon juice and pectin in a small bowl and stir until smooth. Add to the plums, making sure it doesn’t clump up. Stir well. Cook for about 10 minutes.
- Using tongs or a kitchen knife, remove the plum peels (they should separate from the flesh after several minutes of cooking) if you like. Continue cooking for about 15 to 25 minutes, or until slightly thickened; the sauce should coat a spoon.
- Place in a clean, sterilized pint canning jar and refrigerate for up to a month or process (see Basic Canning Instructions) for 12 minutes.

Puttanesca Sauce
This is a twist on a roasted tomato sauce with the addition of anchovies, capers, olives and red chile flakes. In this sauce, the tomatoes are chopped coarsely (no need for tedious peeling and seeding), and tossed in a large roasting pan, then the pan goes in the hot oven to make a roasted puttanesca.
Ingredients
- About 8 pounds ripe tomatoes, any variety, cored and quartered
- 5 medium onions, coarsely chopped
- 10 garlic cloves, 5 peeled and left whole and 5 peeled and thinly sliced
- 5 garlic cloves, finely chopped
- 1 cup chopped fresh herbs (rosemary, basil, thyme, oregano, parsley, and/or chives)
- About 1/4 cup olive oil
- 1/8 teaspoon salt, or to taste (don’t add much because the anchovies are quite salty)
- Generous grinding of black pepper
- 8 anchovy filets plus 2 tablespoons anchovy oil from the tin
- 1/2 cup drained capers
- 1 cup pitted black or green olives, cut in half or coarsely chopped
- Dash red chile flakes, to taste
- A few tablespoons sugar (optional)
Instructions
- Preheat the oven to 450 degrees. In a large roasting pan, gently toss together the tomatoes, onions, whole and chopped garlic, herbs, olive oil, salt and pepper. Roast for 25 minutes.
- Gently stir the vegetables and add the anchovies and 2 tablespoons of the anchovy oil. Roast for another 20 to 25 minutes and gently toss. Add the capers, olives and a dash of the chile flakes and roast another 10 minutes, or until the tomatoes are softened and somewhat broken down into a sauce, with a golden brown crust on top. Remove and taste for seasoning.
- The sauce can be refrigerated for three to five days, or it can be frozen in a tightly wrapped plastic bag for several months. The sauce can also be placed in sterilized Mason jars and processed — 20 minutes in a boiling water bath should do it. It will keep for up to 10 months.
- Toss the sauce with pasta, or serve it over grilled chicken or fish, or in any dish that calls for regular tomato sauce. You can cut the recipe in half or make a huge batch, all depending on how many tomatoes you have.
- If the sauce tastes bitter, add a few tablespoons of the sugar. Add salt and pepper and more chile flakes as needed. Place in clean, sterile jars and refrigerate, freeze or can (see Basic Canning Instructions).
Can't get enough canning? Here's a song recommendation from one of our listeners: "Canned Goods," by Greg Brown.
This segment aired on September 15, 2017.